Pages

Tuesday, August 29, 2006

Collecting Hay


Summer is almost over and it is time to start getting ready for our long winter of feeding animals. To that end, we have purchased 100 2nd cut alfalfa bales. They are certified organic and are very rich. We will mix this hay with our grassy organic hay from our own land when we feed the cows. The pigs will eat this rich alfalfa hay as it sits. I will run it through the hammer mill and then mix it with the grain chop. I can feed it dry, but they much prefer it when I mix it with warm water. It makes a great smelling green porridge! Very tempting. We only got 72 bales on this load. Tonight I will drive to the farm and pick up the remaining 28. I do need a bigger trailer. Usually, I would take the big Ford diesel for a job like this, but I have the insurance off it for the time being and didn't think to reinstate it for this week of hauling hay.

Monday, August 28, 2006

Seed Drill Ready To Go


I spent a good part of Sunday working on the new Seed Drill. I needed to get it degreased, washed out (Organic regulations) and then I had to tackle the missing drive chain and broken seed housing. The first thing I did was take a trip to the local Ag Store (UFA) where they were mostly likely to have chain in stock. Sure enough, they had exactly what I was looking for...only $50!!! Next, I needed some sort of epoxy and some bolts for the seed housing repair. I settled on JB Stick Weld, a putty epoxy that you knead in your fingers and apply. I needed something that wouldn't run into the cracks and mess with the rotating seed dispenser. It seemed to work really well and set up hard in a matter of only a few minutes. Actually, before I applied the epoxy, I clamped the housing together and drilled and bolted it tight. There were still some gaps in the cracks, but that was OK because I knew the epoxy would fill them. Actually, I was glad for the gaps, thinking that perhaps they would give the epoxy something to 'grip'.
Figuring out how to separate that chain was an excercise in futility. That is the thing that is missing on my farm...some old-timer who knows second nature, how to do these basic chores. After much deliberation, it occured to me that I could bend the link a certain way, give it a few blows with the hammer and it would pop apart...success! I got the chain down to the correct length, got it on the sprockets and that part was done.
Chain was on...seed housing was fixed...a quick wash and degrease and I had a fully operational seeder for the back of the N. Now all I need to do is find some seed. For whatever reason, I am having one heck of a time finding both Fall Rye and Buckwheat seed right now. I don't need the buckwheat this fall, but I sure need the Fall Rye. I have placed many calls and the organic farmers I am talking with are all having the same problem. Why more people don't grow it for seed is beyond me considering the demand amongst organic farmers. I can't wait to take the seeder out to the back field to get it earning its keep.

Thursday, August 24, 2006

The Broke Seeder Part


Here is a better view of the part that I broke. I assume that it is cast aluminum and it is quite thin. Any ideas out there for how I can fix this? There is a sliding cam that needs to fit into this housing and it does need to have the strength to resist the turning of said cam. Still though, I don't think it needs to be tremendously strong or they would have made it thicker to begin with. I have been told that perhaps some sort of epoxy would work.

My Project Last Night


This is the new seeder that I bought. Well...as you can see it is definitely not new...new to me though. It is a Midwest One Way Disc seeder. Actually, it is quite ingenius for how simple it is. As the discs rotate in the soil, a chain (that is currently missing) turns the sprocket that drives the rotors in the seed compartments. As the rotors turn, seed is dispensed into the tubes that are located between the discs. The seed drops and then are covered in soil by the discs. It is so simple and basic and yet fairly clever. The old fellow that I bought the unit from had it for 40 years or so and never used it as a seeder! He had it for working summer fallow. As a result, the shaft was steadfastly rusted and wouldn't turn. Heat and oil and penetrating fluid and a lot of banging and clanging around managed to get it to turn. However, without taking it completely apart I had no idea where it was bound. I finally forced it enough that one of the seed housings broke and then I knew where the problem lay. The good news is that only one assembly was rusted solid...the bad news is that the cast aluminum housing split. Now I have to figure out how to weld cast aluminum (or braise it). I have no idea what to do at this point in time, but I will ask around and figure it out. Once I get the seed housing fixed and continue lubricating the shaft, I will have a usable old seeder for behind the N.
One other fascinating aspect of this seeder is the lifting mechanism. It is a big ole heavy thing that normally the Ford N 3pt. hitch hydraulics wouldn't be able to handle. The lift arms actually hook on to the seeder and when you lift them, a cable and pulley system pulls the wheel at the back of the seeder down, thereby lifting the entire set of discs off the ground. This of course disables the seeding action and allows you to transport the seeder between fields. I will post a picture of the seeder in action once I get it unloaded from the trailer and hooked up to the N.

Monday, August 21, 2006

Happy Girl


I moved both sows into their farrowing field. I am hoping that they are now both bred. The farrowing field is approximately 100' x 100' and has a good mix of grass pasture and bush. There is a large amount of shade and rich pasture full of dandelions and clover and grass. It has been vacant for several months and when I put the girls in there this weekend, they were in hog heaven! They grazed for a few hours and then slept soundly for many more hours! I think they were happy to be away from that pesky young boar who was always nudging them around.
Bubbles is still in his field, but it has been greatly expanded with the removal of the electric fencing. It is about the same size as the farrowing field and is where the corn was growing. He is very busy now destroying corn stalks and grazing away happily. The cows and llamas are in the large field beside him and when they come up for water, he has company.

The Farrowing Hut...another view


Here is a view of the roof opened. You can also see the carpet flaps that allow the pigs access to and from the hut. When I last farrowed at the end of January, I hung a heat lamp from the peak. That, combined with the body heat of all those pigs, made it very comfy in there!

The Farrowing Hut


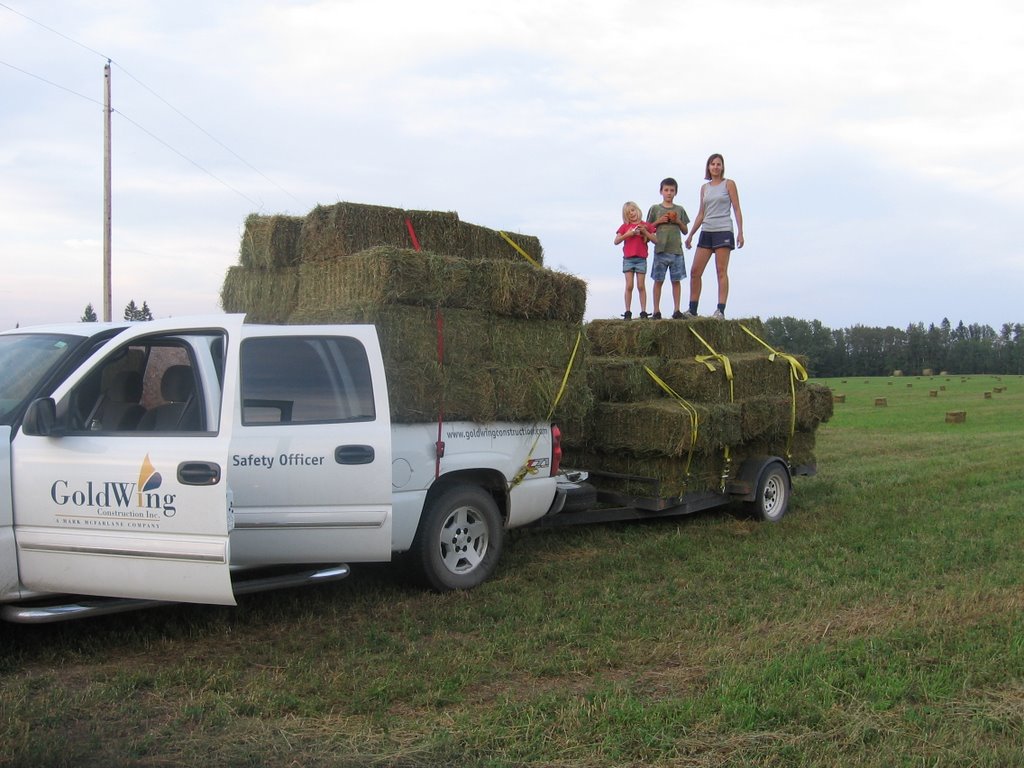
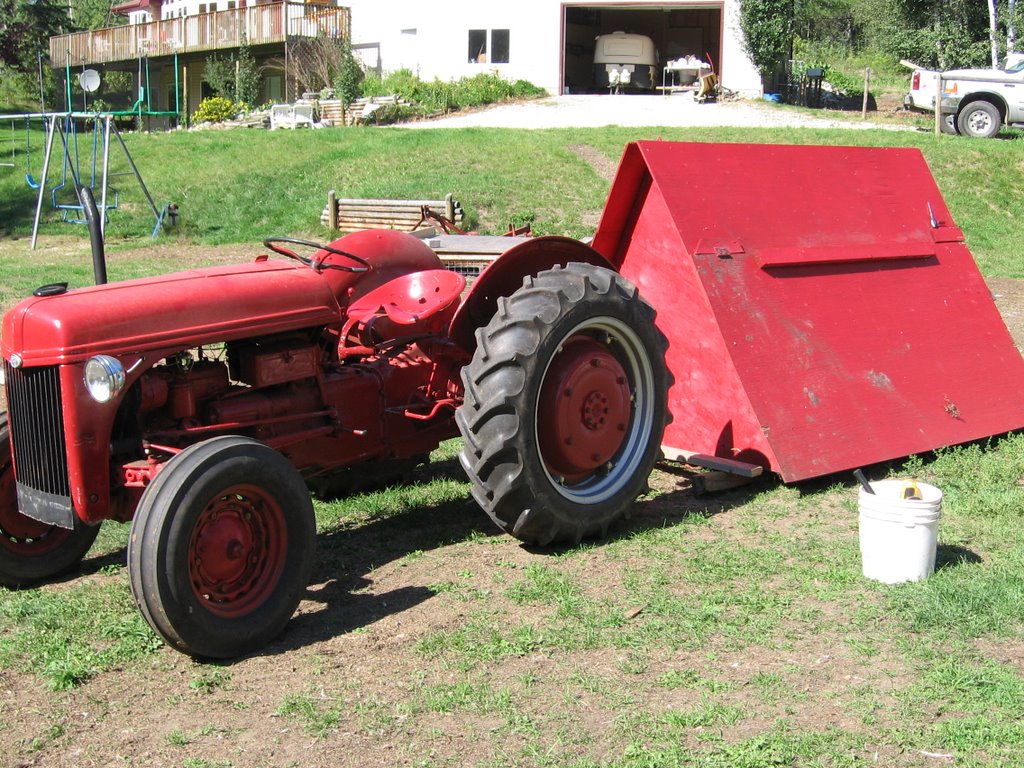
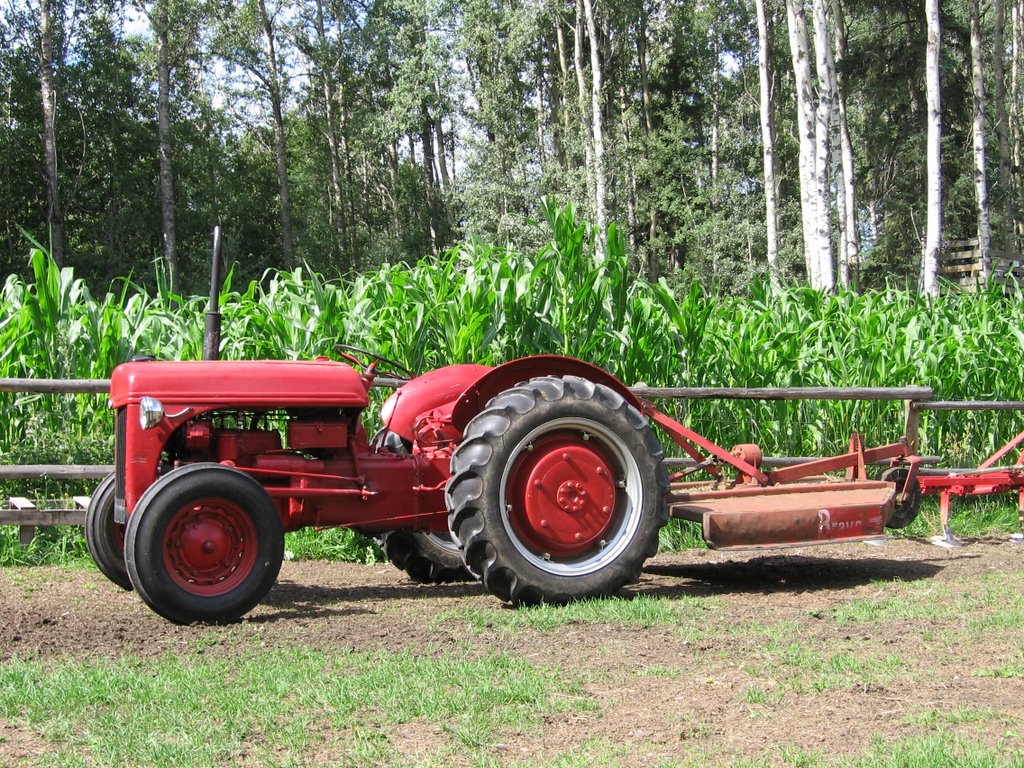
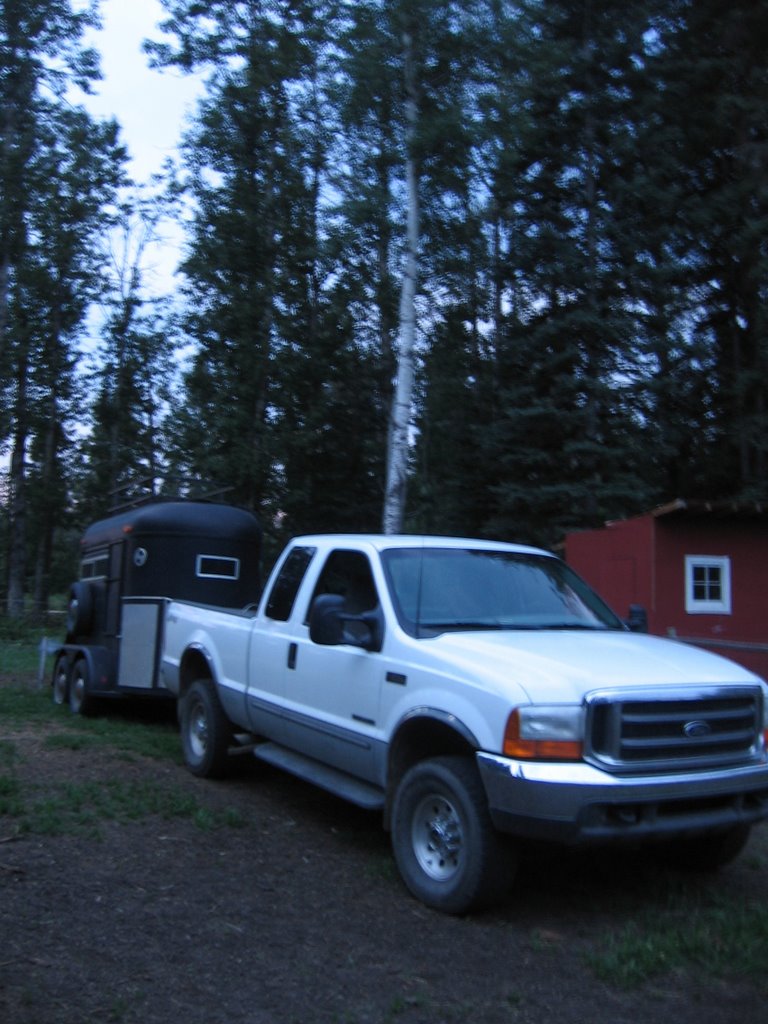
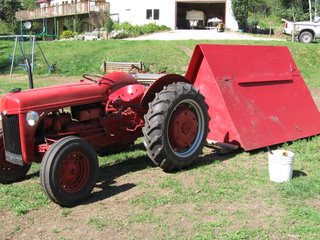
This is the first farrowing hut I built. It functions nicely, but with my really big sows, it is slightly undersized. It is approximately 8' x 6'. For a gilt or a younger sow, it would work perfectly. Still though, it is the only one I have at the moment and will have to make due for at least one more farrowing. I used the Ford tractor "the N" to drag the hut back to the yard from the Deer Field over the weekend. It was in need of some repair from the time that I dragged it out to the Deer Field! I built a transport skid for it and that works a little better instead of just dragging it by itself. When I built the hut, I did install small skids on the bottom but I have discovered that they are much too small for my rough ground.
When the hut was first constructed, I considered a few things. Number one, I wanted a slightly assymetric design to the hut. I wanted more of an angle on one side so that the piglets would have more room to get out of the way. With the slope of the roof, the sow is restricted by height in trying to lie down right against the wall...did that make sense to you?! For instance, if the wall were vertical, there would be no restriction to her laying right up against the wall and squishing her pigs. With the sharper slope, the pigs can squeeze up against the wall and escape being crushed when 'Mom' comes in to rest or nurse.
The other consideration I had was the fact that sows with very young piglets are very protective of their young and won't hesitate to come at you fast if you try to handle them right in front of her nose. I decided to hinge one side of the roof to allow me to sneak peeks at the piglets or to grab them when I need to without the sow being able to get me. She enters from the flaps at the front of the hut and typically sleeps with her nose facing the front. If I open the hinged roof slightly, I can gain access to the piglets if I have to. It works well enough. In warm weather, I can also prop the roof open to allow for ventilation.
The hut has no floor in it. The sow, when she is ready to give birth, will gather many mouthfulls' of straw and build her nest within the hut. Once the hut is no longer being used, I simply drag it to another location where it is needed.

Friday, August 18, 2006

A Jar of Honey


Here is a jar of honey from our farm. This is the label I created using Logo Design Studio. I simply printed the logo on standard Avery labels. It worked well. Now that the honey has settled and has been filtered, it can be bottled and go to market. We will sell our honey directly from the farm as opposed to a Farmer's Market or some other method.

Monday, August 14, 2006

Look at the corn now...


it is really getting up there! I am exactly 6 feet tall and it is a good foot or more over my head. It is healthy and strong and I am happy with it in all respects except that I won't get any corn from it!!! Oh well...sometimes experiments just don't work. Here it is August 14th and I have a month of growing season left at most. The corn still hasn't extended the flowers. I am unsure what that is called, but I know that you need the flowering in order for pollination to occur and the cobs to form. There is just no way that all of that is going to occur in the next month. I knew it was a long season corn, but I still thought that there would be the odd stalk that matured earlier than the rest. Doesn't look like that will happen now. I will leave it grow and see what happens, but in the end, I will have to open the gate and let the cows and pigs have at it. Next year I will plant a shorter season corn and try again in another field.

Mowing


I spent a few hours mowing over the weekend. I had promised to mow a neighbor's pasture and did that on Saturday. It was cattle grazed and had patches of Canada thistle that needed to be knocked down. On Sunday, I decided to mow around our place since I already had the mower hooked up to the N. The mower is an old unknown brand rough cut mower or "Brush Hog". It has two very heavy hinged blades that rotate at a relatively slow speed compared to a regular lawn mower. These heavy blades plow through anything that the tractor can drive over. Saplings and heavy grass are quite easily handled. I use it to mow our trails along with the meadow by the pond where our Christmas trees are growing. I planted the trees at a distance apart from each other that would allow me to easily drive the tractor between the rows. I have to keep the grass cut around the trees or they will not develop into proper looking Christmas trees. Also, the heavy grass would rob the young tree of sunlight and water and nutrients. In an ideal world, I would fence the area and find an animal that I could trust to not eat the trees as they grazed. This would save on gas and better utlize the wonderful grass that grows down by the pond.

Friday, August 11, 2006

The Final Product


Here is a 20 pound bucket of Certified Naturally Grown honey. It is a rich golden colour this year...last year, it was definitely a lighter colour. I am not sure why the difference, but it has to do with what flowers the bees visited and also the fact that the frames of honey comb darken with age and therefore, the honey also darkens. I personally like the darker colour of honey, but it is interesting to note that the lighter honeys demand higher prices commercially. In different parts of the world honey comes in a multitude of colours...some of it is dark brown. Alberta is one of the leaders in the world for honey production. There are hives everywhere!

The Old Extractor


This is the extractor in operation. The photo makes it look like it is spinning much faster than it actually is. Really, it doesn't take a fast spin or a very long spin in order to get all the honey out of the frames. There is a large valve at the bottom that, when opened, allows the honey to drain once it is out of the frame. I was looking for an extractor when I saw this one advertised in a local paper. I went to see it and it was in near perfect shape and very old. I am thinking that it was built sometime in the 40's or 50's. It works the same as it did the day it was built and I intend to look after it so that my grandkids can use it if they want to.

A Frame of Honey


This is what a full frame of honey looks like as it comes out of the hive. It looks white because there is a thin layer of bees' wax that covers each individual cell full of honey. This is called "capping". Once the cappings are removed, the honey is ready to be extracted with centrifugal force in the antique extractor.

Extracting Honey!!


Well, I was about 3 weeks late in getting the honey out of my hive. It was just one of those things where I couldn't get organized enough to get it done. Cindy finally picked up some containers and I finally found a few hours to try to get the job done!

The first step in extracting our honey was to get the bees out of the way! What I do is take the boxes (supers) full of honey and bees and set them aside and on their sides. When the 'hive' is re-orientated on its side and exposed to the light and open air, they will vacate. At the same time, I replace the full supers with empty ones to give the bees room to start filling comb again. After I take the full boxes off and tip them on their sides, I simply wait for a couple hours to let the residents get out of the way!

The next step was to actually take the honey from the comb. This is the fun part. The frames are taken out of the supers one at a time and I cut the cappings off. The cappings are simply the "corks" that the bees put over the honey to let it cure and keep it safe for later. Once I have the cappings removed with a long knife, I can place the frames into the old extractor.

Once all four frames are placed into the extractor I just spin the handle for a few seconds. It doesn't take more than 30 seconds or so of spinning to get all the honey out. Once one side is extracted, I flip the frames over and spin them again to empty the other side.

Last night I only managed to get one super extracted. It was cold and rainy...about 15 degrees celcius. The honey wouldn't flow very well at that temperature and it took a long time to have it go through the sieve and into the large buckets. I need to put the raw honey into disinfected buckets to let it settle out any foreign particles and impurities. The air bubbles rise to the top and the particles fall to the bottom. In a few days, the honey will be ready to bottle.

It is amazing honey...when it is fresh you can still smell the flowers! It tastes wonderful that I can tell you!

Wednesday, August 09, 2006

The Stock Trailer


Just an old 2 place horse trailer built in the 70's, it has served us well as a transport for everything except horses. I saw this trailer sitting at a neighbor's place with a "for sale" sign on it and was immediately interested. I am always on the look-out for a deal and if there is any way that I can "horse trade", I will. I knew that this neighbor was a mechanic and had heard that he was looking for a quad. At the time, I was the owner of a mid-90's Polaris quad. I am here to tell you that unless you are a mechanic, you probably do not want to own a mid-90's Polaris quad...maybe it was just my particular machine, but what a mission to keep the thing running. I approached the neighbor with the deal and to my delight, he agreed. The trailer was worth quite a bit less than the market value of the quad, but I didn't want him to think badly of me in case it was beyond his ability to restore so we traded straight across. The last I heard, he had gone through the machine with a fine tooth comb and had repaired or replaced all he needed in order to get it running properly. Our new trailer was painted and I replaced a few light lenses and it was road worthy. We transport our chickens to market, our pigs and now cows and it seems to work very well.

I pull this trailer with a 2000 Ford F250 turbo diesel. It is my old truck and has been retired to farm duties now that I have a new chev 1/2 ton. When the Ford was newer, I spent a little money on extras. It has a performance exhaust and it is re-programmed for more performance. Needless to say, it pulls the little stock trailer quite easily and it is a great highway unit. Up and down hills without a complaint and quite reasonable when it comes to operating costs.

Cows in the twilight


On Monday we went over to some friends place near our farm. They have an acreage and keep a few cows for beef. Because they do not have enough acreage for the cows, they end up feeding hay throughout the winter. With our cow "Henny" out in the pasture alone with her calf, we thought that if we took a few cows in they would keep her company and we would be able to clear out some overgrown pastures on our property. It is a win win situation because we get some pasture cleared and our friend doesn't have to feed this summer. Our trusty stock trailer in tow, we made the 3 minute drive to the neighbor's place to pick up some extra members for our "herd", two Hereford cross heifers.

Cows are so interesting to us. Having never kept them, we are learning daily about their behaviour. There wasn't the big melt-down rodeo that occurs when you introduce strange animals to each other in almost every other species. Pigs spend the next few hours chasing and butt sniffing and squealing in horror at each other. Horses run at full throttle chasing and biting. Dogs....well you get where I am going. When we let the two new cows into the pasture with Henny it was almost disappointing! They sniffed noses with each other, bellowed a time or two to each other and then just started walking around together grazing. I am glad we didn't have fences to repair or vet bills! It was funny this morning because "T-bone", the calf, was mock fighting with the other young heifer. He is so little compared to her, but she seemed to be enjoying the play time also, and was very gentle with him.

Tuesday, August 08, 2006

An update on my girls...


Back in May I sold two of my best girls to a farmer in Manitoba. These gilts were from a litter that was farrowed on January 31st. I took a drive down to Regina, Saskatchewan (about 8 hrs) to meet Neal and do the "pig transfer". I am always interested to hear or see how my animals are doing in their new homes. By the looks of this picture, they are growing well and seem to be very healthy and fit. I am glad that Neal is taking such good care of them.