Tuesday, December 19, 2006
Gathering Winter Fuel
 One of the best feelings in the world is having enough wood stored to last you a significant amount of time for your heating needs. I had promised myself that I would spend the summer months gathering wood while it was warm and there was no snow to contend with. Of course, I didn't get that done and ended up starting the winter with almost no wood to speak of. This past weekend though, I did spend a few hours cleaning the woodlot immediately in front of our house. I managed to collect enough wood to last a week or two. We use the wood in our stove downstairs. It is a large stove that keeps up with our heating needs for the most part. When it is really cold though, the furnace will still kick in overnight as the fire dies. I really want to get organized enough for next year to start collecting wood in the spring and then do small amounts of work throughout the summer to get enough wood cut and split to last the entire winter. I figure we will need somewhere around 4 full cords.
Tuesday, December 12, 2006
Christmas Tree
Every year we venture out into the bush on our property to find the family Christmas tree. It is alway fun to trudge through the deep snow in the willow brush yelling to each other "here's a good one!" Of course, everyone is yelling the same thing at the same time! Eventually though we find THE one and start the drag home. This year, we had pre-scouted the tree in the fall and walked right up to it.
Friday, December 01, 2006
All Crop Combining
This is Bob D. harvesting beans near Ridgville, Indiana. Pretty cool to see these old combines working.
Monday, November 27, 2006
Cold Cows
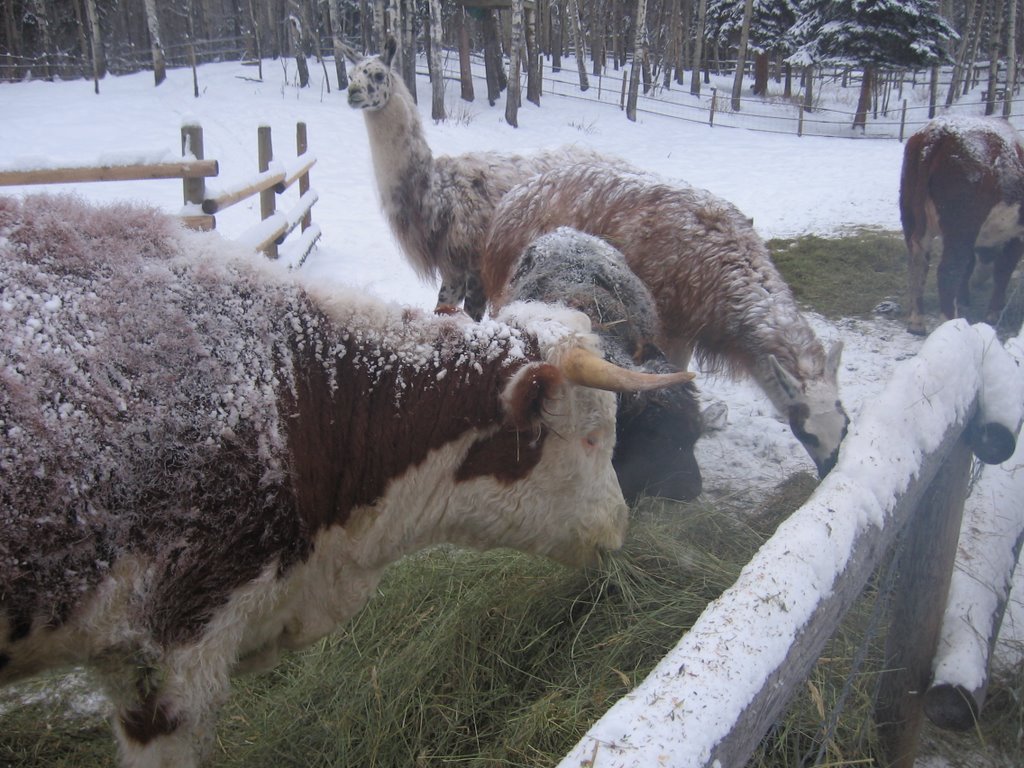 The cows don't venture far from their feeding area anymore. With the cold temps, they pretty much huddle around waiting for the next feeding. I am giving them quite a bit more hay than usual and they seem to be keeping good weight on. The insulation they carry is amazing. They always have a thick layer of frost and snow on their backs, a strong indication of just how efficient they are at staying warm.
Brrrrrrrr...
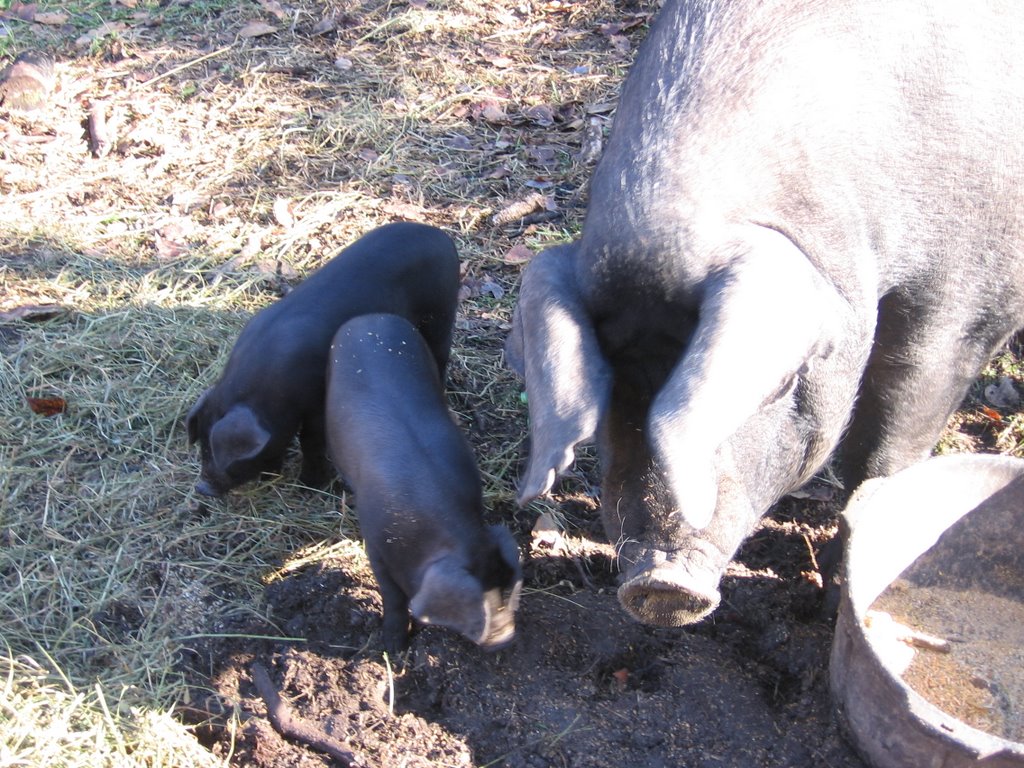
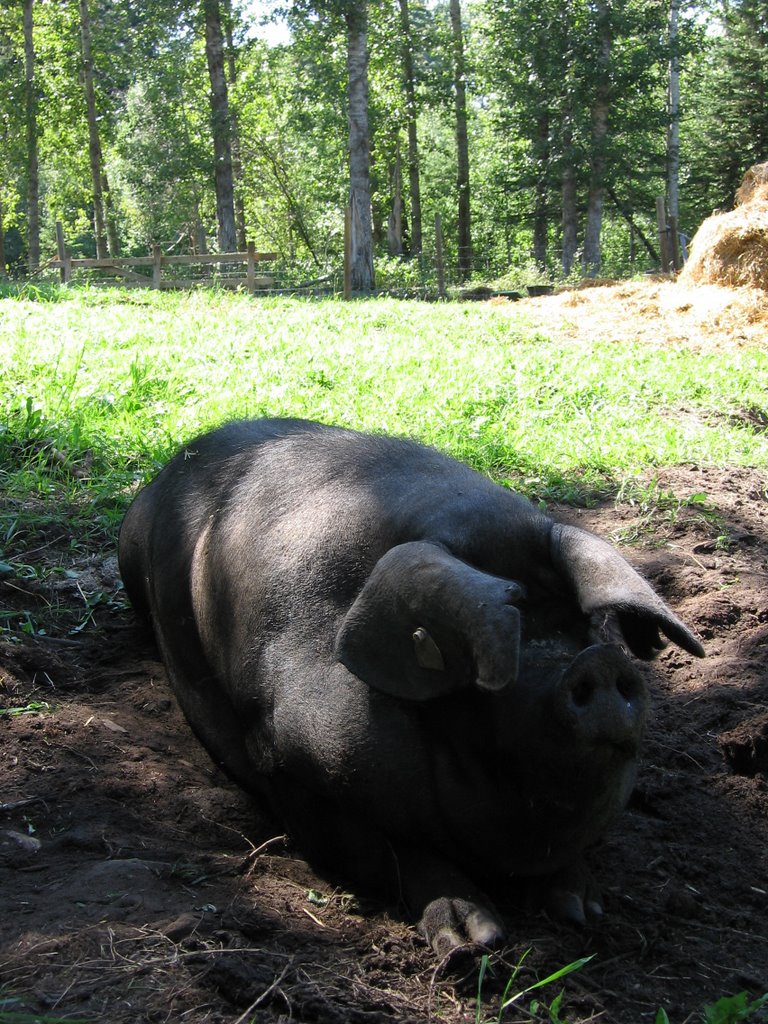
 It is definitely winter around here. The weather is unusually cold for this time of year. While November almost always acts like winter, the temperatures are usually just under freezing for a daytime high. Right now though, and for the past week, the daily high temps. have been below minus 20! There have already been a few nights with close to minus 30 temps. At these temperatures, the equipment is impossible to start without being plugged in and the animals need extra feed. On top of these cold nights, the snow has been falling relentlessly. We have more than a foot out in our pastures now. Still though, the animals cope well. There is no shivering or apparent distress. They eat more and sleep more and that is about it. When the pigs come out of their barn for supper, they soon develop frosty beards of ice from the steaming porridge. This is Bubbles, he is growing fast into a big ole pig. He still has the funny personality that he always did, although his growing size makes him more and more docile.
 Friday, November 24, 2006
Duals on an Allis?
 I am thinking of adding dual wheels to my Allis Chalmers WD45. It looks pretty cool, but actually serves a purpose too! In our area, we have some hills along with some sandy loam soil. This makes traction a problem at times when working hard at something like plowing or chisel plowing. By simply adding two more rear wheels, you can add to the weight of the rear end and add more gripping power to the ground. The fact that it looks so cool is just a benefit! This is a picture that a fellow Allis man sent me. Leon's Allis CA looks like it is ready for business. In my mind, having grown up around International Tractors like the 1086, all tractors should have duals!
Monday, November 13, 2006
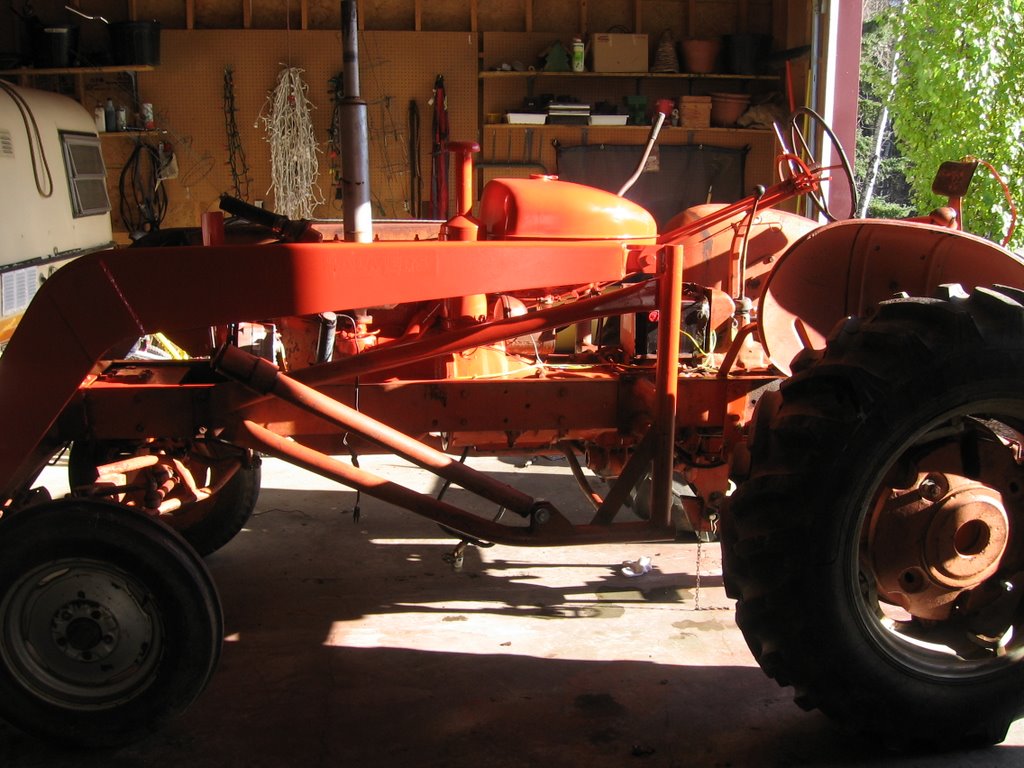
Allis in the snow...
 I am almost finished with the Allis for this year. I have the loader back working and the shifter has been fixed. Although, I noticed that I still cannot get it into 4th gear! This will have to be remedied before spring work starts. For now, the loader will be a great help around the farm. Moving snow and loading and unloading acquired equipment from the trailer is something that had to be man-handled until now. I still need to re-work our truck mounted snow plow to be able to attach it to the front end loader. We used the plow on our Ford Expedition, but Cindy traded that in on a Honda a couple years ago. Good timing with the current price of gas! Anyways, we always held on to the plow just in case. A set of mounting brackets for my Ford diesel is more than $200. I can easily save most of that money by fabricating a way to mount it on the loader and use it with the tractor.
Loading Facility
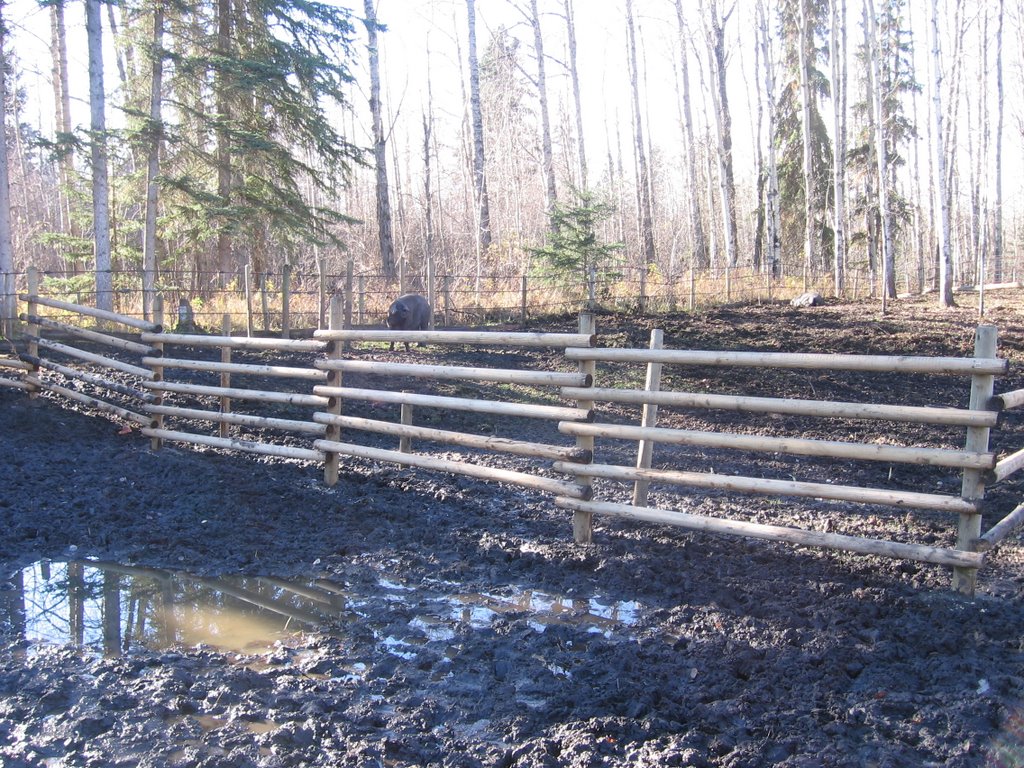
 I am almost finished with our new loading facility. This series of pens and a chute will make the process of loading livestock for transport much easier than it has ever been. Instead of chasing animals and trying to force them into a trailer where they quite clearly do not want to be, we can simply guide them into the "V" shaped corrals that leads to two sorting pens. The second pen has another "V" guide that takes the animal to the chute. I still have to install the various gates, but I used the system this weekend to load our Highlands/Galloway cross cow "Henny". She is off now to visit her boyfriend for awhile. The pens are just the right size for our farm. Any bigger, and I feel that I would need help to get the animals sorted and loaded. Henny is quite wild and I had her loaded in about a minute and a half! Excellent! I am a little proud of the design and the ease of use although it is nothing new and plans on-line showed me how to design the catch pens and gave me dimensions for the chute. The next thing to do besides installing hardware and gates is to design and build a slide-in chute within the chute that will make the chute usable for our smaller animals like the pigs and sheep. With a chute that is cattle-sized, the sheep and pigs will easily be able to spin around and make life difficult for us.
Monday, November 06, 2006
Another View of the All-Crop/Roto-Baler

 Just thought I would publish more photos of both pieces.
From this view, you can see how complete the baler is. The belts are far less than perfect and will need replacement. Belts on the combine seem fine, but who knows when it actually starts working. Bearings will need TLC. The back of the combine shows how perfect this machine is. There is next to zero rust. Paint is still ok too. Will need canvass (which seem to be rolled up inside!). It is also missing the cutting bar and teeth. That shouldn't be too bad to replace. Otherwise, I have my fingers crossed that there is very little to do.
Border Collies of the North...
 We have always owned Collies, but at one point we had the best Labrador in the world. He passed away several years ago and I still miss him greatly. He was a tremendous duck dog. My wife acquired a couple sled dog harnesses from somewhere and she always used the dogs to mush to the mailbox about a mile away. She always got weird looks with her full-size dogsled and team of Border Collie and Lab! The Border Collie was always smart and she quickly figured out that if she just kept the rope tight, she could appear to be pulling but it was always obvious that Brant was maintaining all forward momentum! He would sure pull. Now our old collie is 13 and her only duty is to try not to get herself killed around the equipment. She is deaf as a post and I now have to be very aware of where she is when I am moving equipment or vehicles around the yard. Our new Collie "Tag" is almost 2 now and Cindy decided to try him out in the harness yesterday. It was amazing how quickly he learned to pull. Obviously, he can't pull any amount of weight, but it is still fun for Mrs. Schneider to go to the mail.
A Sheep Auction
 As I drove to St. Paul on Friday with my load of chickens, I noticed a sign at the auction mart that stated there was a sheep auction that day. Instead of waiting around inside the truck for 5 hours for the birds to be processed, I decided to attend the auction. Cindy and I have been spending a good amount of time researching sheep and are planning on acquiring a few sometime soon. The lamb meat market is good now, and with a booth at a farmers market next year, we should be able to do well with our pork, chicken, beef and lamb sales. There was not a strong turnout of sheep at the sale. The roads were not good and I think that turned off a lot of people from attending. I missed out on bidding on a couple nice ewes, but thats ok. We will keep looking and find what we want in time. The thing we like about sheep is that they are a little more gentle on the fences and safer for the kids. It should be noted that the prices at the auction were fairly steady. Ewes of any age were going at $1.20 - $1.40 per pound and Rams, nice or otherwise were around $.60 a pound. There were a couple of buyers that bought most of the stock. I assume that they were feedlot operators. Most of the groups were in numbers that were too large for me to consider. It would of been nice to be able to pick out a few nice ewes instead of buying an entire "flock".
The Last Chicken Day!
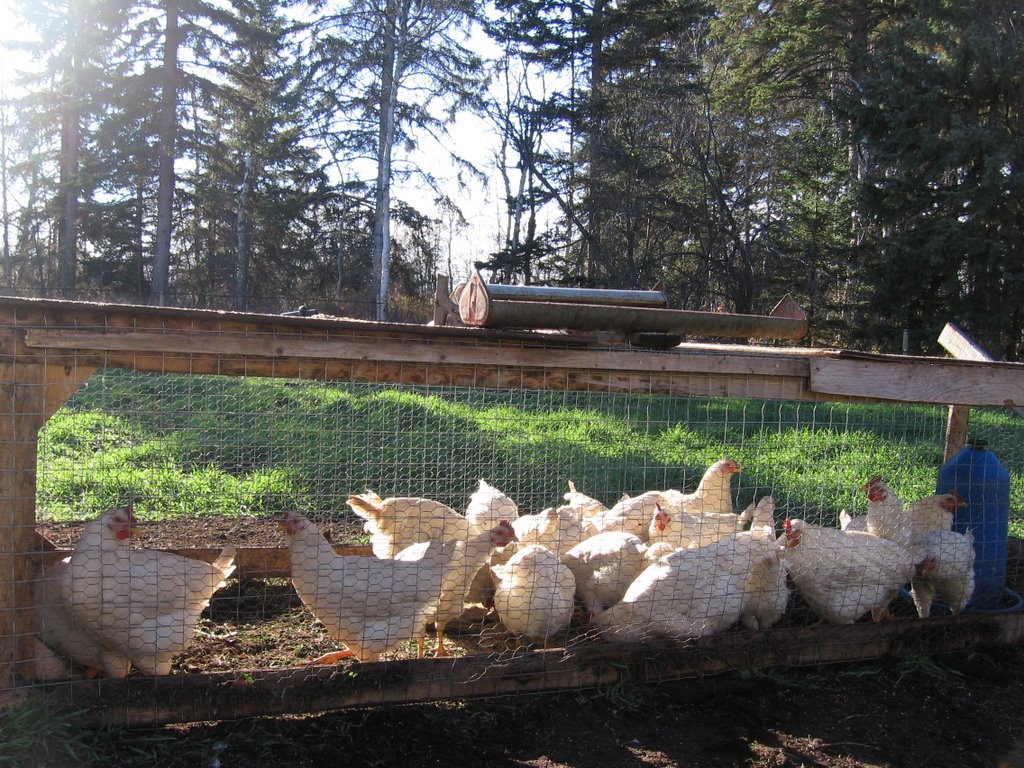
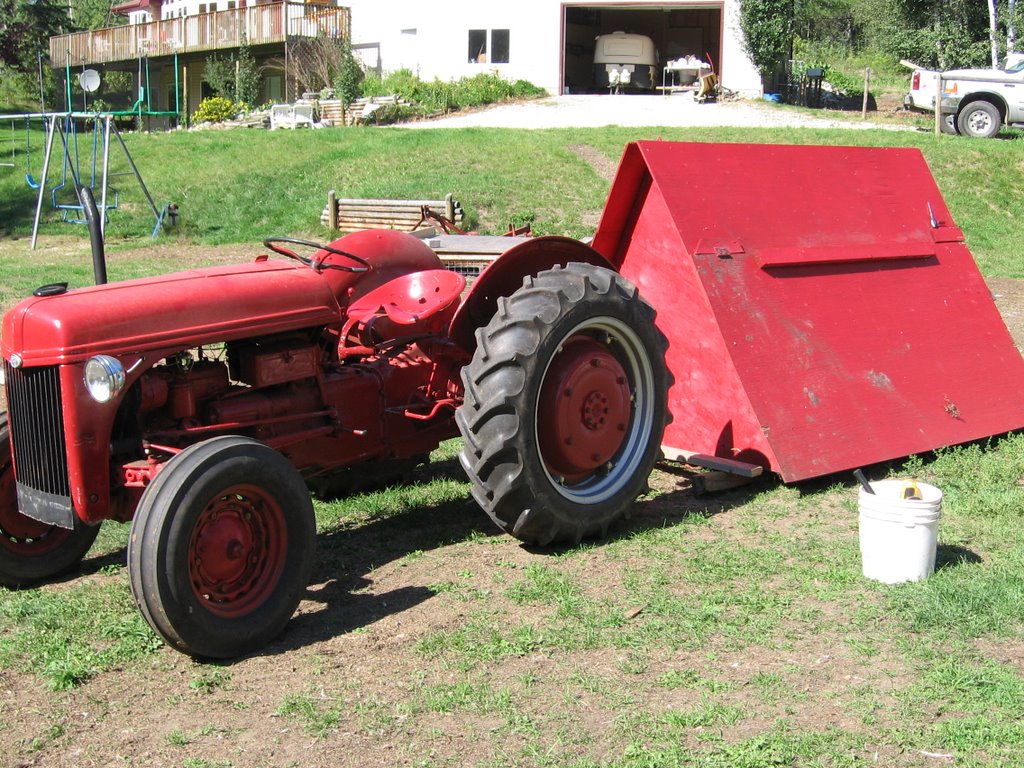
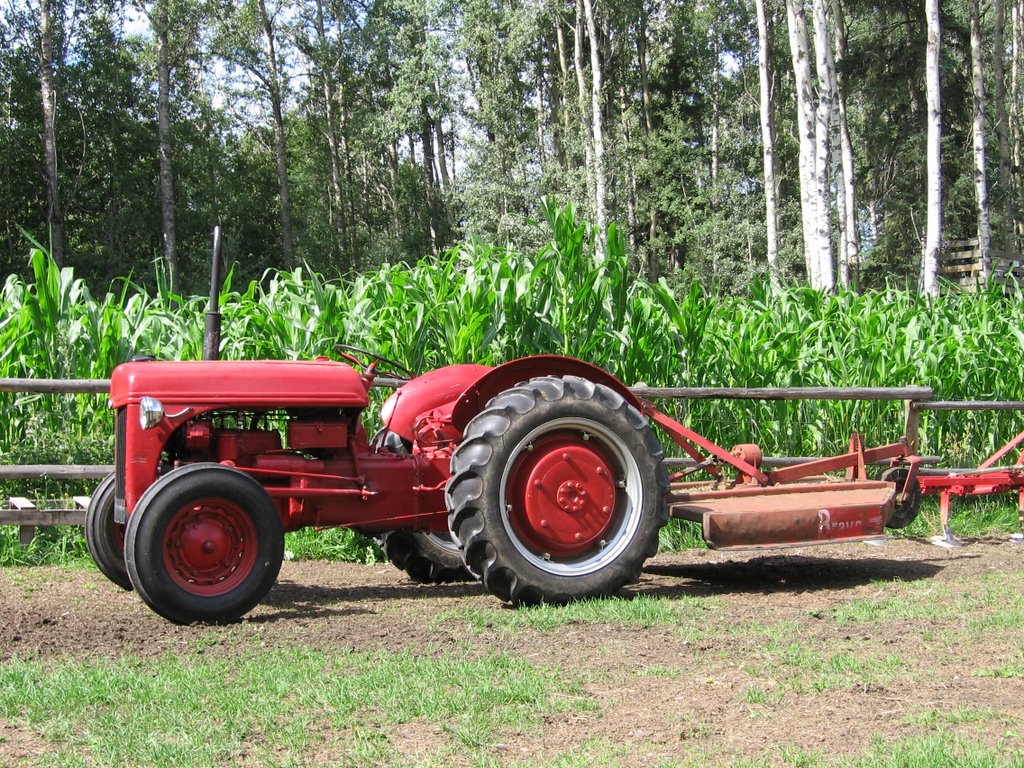
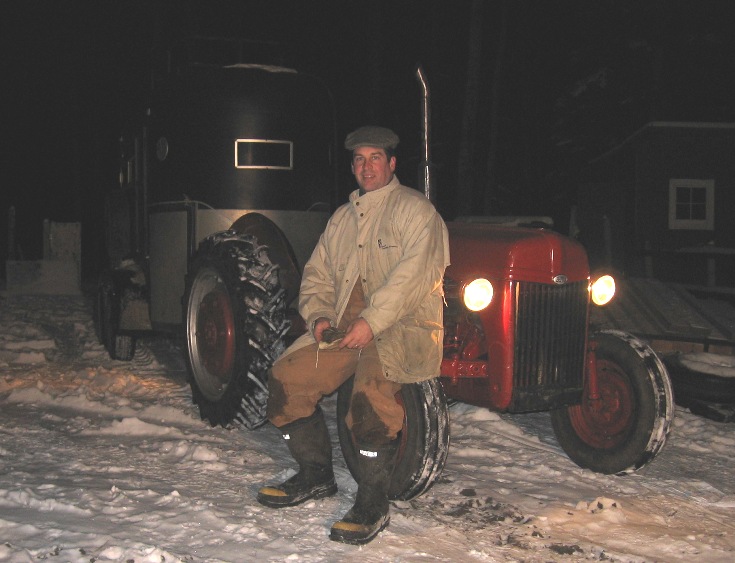 Thankfully, this is the last shipment of pastured chickens to the processing plant. As usual, the night before, I loaded up the trailer in the field with the old Ford 2N tractor. As you can see, we have a good amount of snow now. This was the latest we have ever kept our chickens in the field. We had them on Fall Rye and had to feed alfalfa hay the last week or so as the birds couldn't scratch through the snow enough to feed properly. The birds had put on a good layer of fat, but not too much and with all the fresh greens they had to eat, they turned out beautiful. We had a chicken dinner on Sunday night and man was that a treat. There is such a difference between store bought chicken and pastured that you would never believe me. You simply have to try it for yourself.
Old Tractor...
More Allis Finds!

A Good Allis Weekend
 On Saturday, my friend Vince and I spent a good part of the day driving the countryside looking at various pieces of equipment that he had scouted. He knew I was looking for an All-Crop combine along with a Roto-Baler and some other stuff. It ended up being a good day! We stopped by a neighbors' place who had this old All-Crop sitting in the hedgerow. We talked with him briefly and the farmer was happy to see it go somewhere with the intention of being used again. I got it for free. I didn't stop long enough to look at the serial number or anything, but I think that it is an All-Crop 72 and it doesn't look all that old. We stopped at a couple other All-Crops and they were absolutely decrepit in comparison. It is a straight cut type of combine and that is quite rare up here in Canada as our growing season is short enough to make swathing a necessity in most cases. Nowadays with improved crop genetics there are more and more straight cut varieties of grains, but back when this combine was new, there would have been many years where the crops simply wouldn't get combined. Perhaps this combine was used to harvest clover or alfalfa seed? I don't think that I will risk trying to take this combine home right now. The roads are covered in salt and Vince indicated that it might do damage to the machine down the road. We will wait until the roads are dry or spring...whatever comes first. An addendum...I have heard from several Allis Chalmers experts that this is indeed NOT a 72 model. It seems that the 72 has an auger at the head as opposed to canvass. It is either a 60 or 66. I will get the serial number and find out more details.
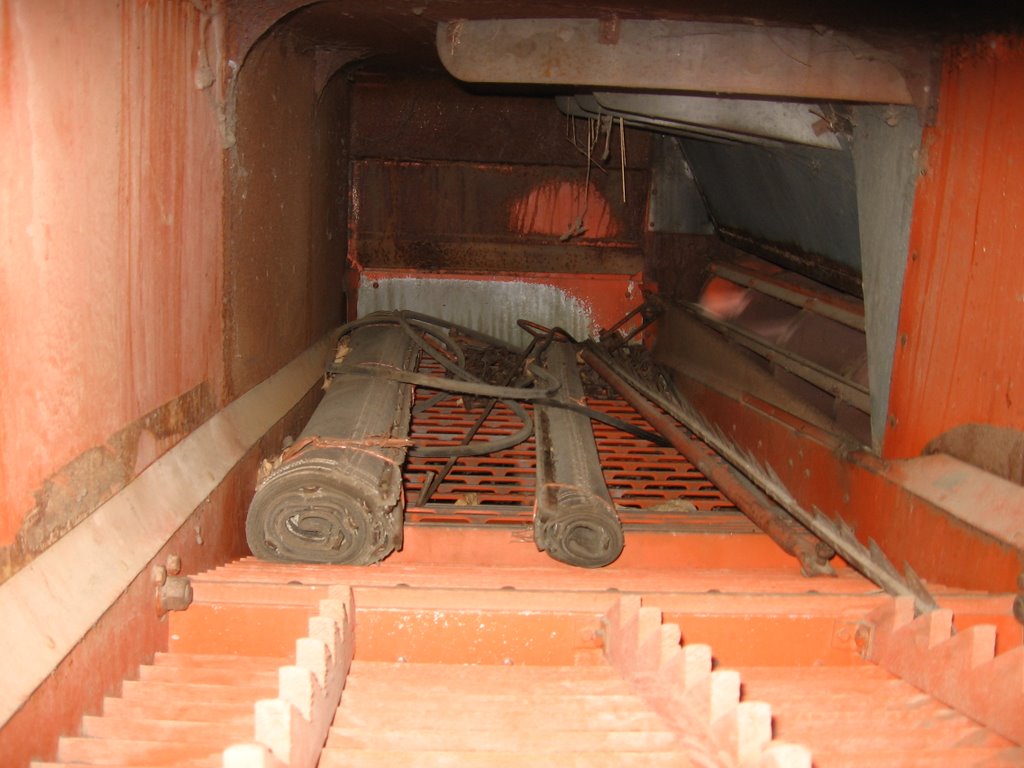
Wednesday, November 01, 2006
Still working the Allis...
 Still busy around the farm. We have had a bunch of snow over the past weekend. Last night was Haloween and I spent the evening re-building the shifter on my Allis Chalmers tractor. I have been spending a lot of time on this piece of machinery. I am trying to get it up and running in time for winter chores like snow removal and unloading big round hay bales. The website Unofficial Allis is a tremendous website with a great forum full of people that are extremely knowledgable and helpful. I have spent a good deal of time there asking opinions on how to fix up my old tractor. I am getting fairly close now. The hydraulic system has been re-plumbed and with new hoses and rams for the front end loader, that system is working very well. All I have left to do there is weld the control arm back on to the control valve. That will be a little tricky as it is in a tight spot and I cannot let the shaft get too hot and melt any o-rings inside the pump. A little spurt or two with the 110 volt mig should suffice to hold the arm without getting too hot. Once I get the transmission shift tower back together and re-installed I will be able to perform a good tune-up on the tractor and I might be finished! It was running rough and I noticed liquid coming from one of the exhaust ports...suspecting something wrong, I pulled the spark plug and it had been collapsed on itself somehow. There was definitely no spark there! I have new plugs now and will re-build the distributer later.
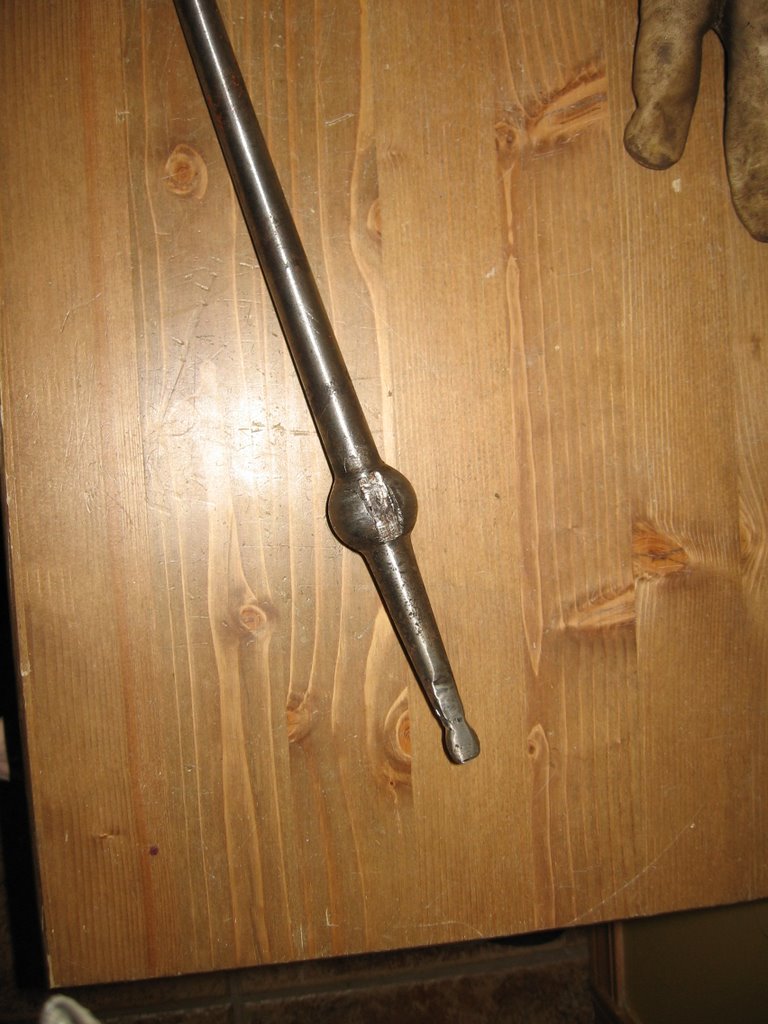
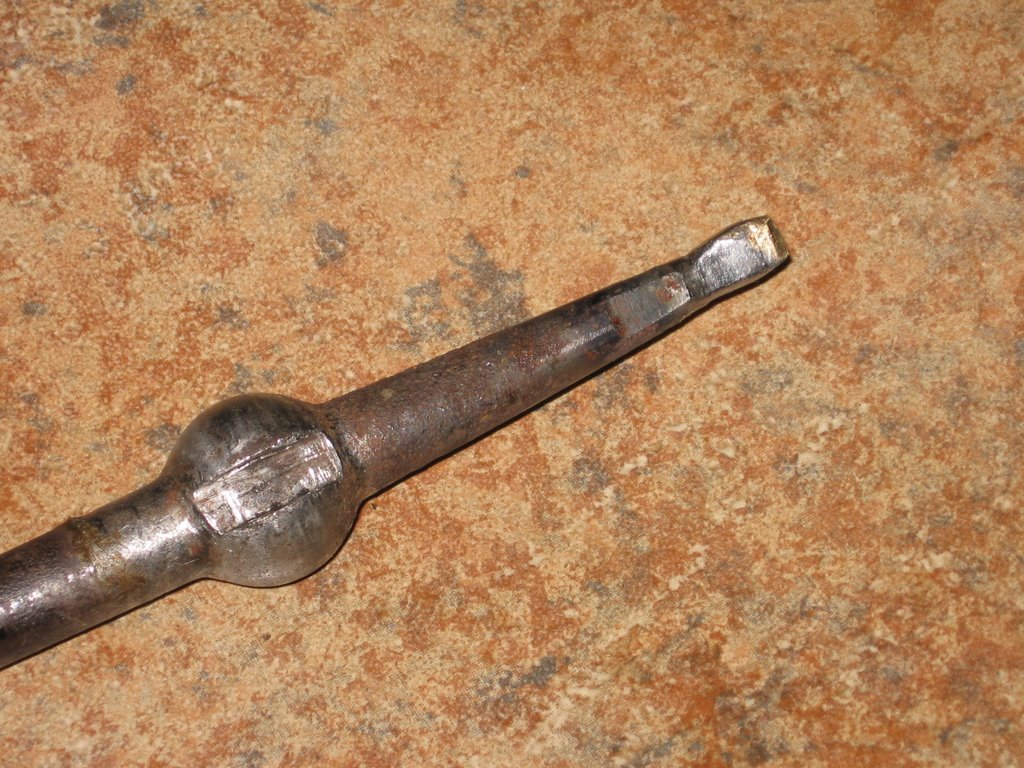 These two pictures show the shifter before and after. The before picture is at the bottom actually. As you can see, it was quite worn. I built it back up with the welder and a belt sander to get it back to shape.
Monday, October 23, 2006
The Piglets Are Fine
Building A Corral
The Allis Is Apart
Pastured Chickens
Tuesday, October 17, 2006
The New Tractor

Thursday, October 12, 2006
My Friends' Combine

This is a friend who lives along the coast of BC. He operates a small diversified farm and uses this old Massey 35 combine each year to harvest small fields of oats and other grains. It looks like the old combine works really well although I can feel the "itch" just looking at the picture! I get itchy with grain dust while I am inside the cab of my 503 let alone the open station of the 35 being so close to the table. It is a neat old combine and the perfect size for a small, diversified farm.
Inside the 8550

The AC 8550 is a fairly easy tractor to drive. The controls are well thought out and handy. I was pulling a relatively small cultivator, but I was breaking pasture/hay land that hadn't been dirt for years. The roots were thick and the ground was compact. The goal for the day was to simply create some 'scratches' in the soil to allow the tiller to come along next and really get things worked up. I would say that overall, I accomplished more than just scratching the surface. There were some spots with thick grass where the shovels would dig in and we just skidded along the surface, but those were isolated spots. This is what I saw each time I looked back.
The Allis Chalmers 8550
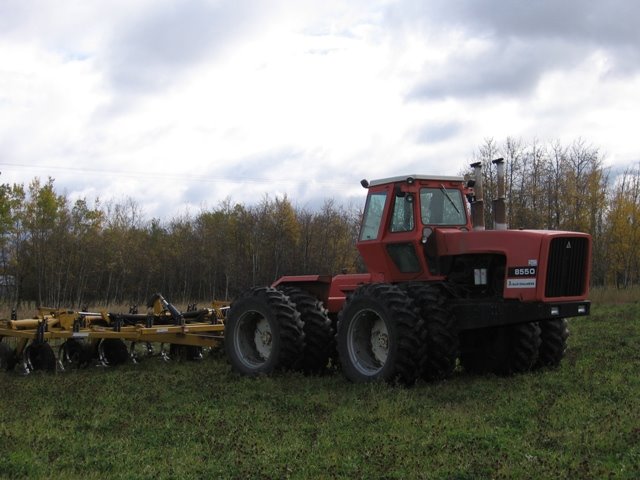
Time for Fall field work. I have been busy over the past while cultivating fields in preparation for next years' seeding. First, I was helping with Vince's field work. He acquired a new piece of property and I spent a day going over it with the cultivator. One of Vince's tractors is an early 80's Allis Chalmers 8550. I believe that this was the largest tractor that AC produced. It is big!
Friday, October 06, 2006
Piglets Have Arrived!
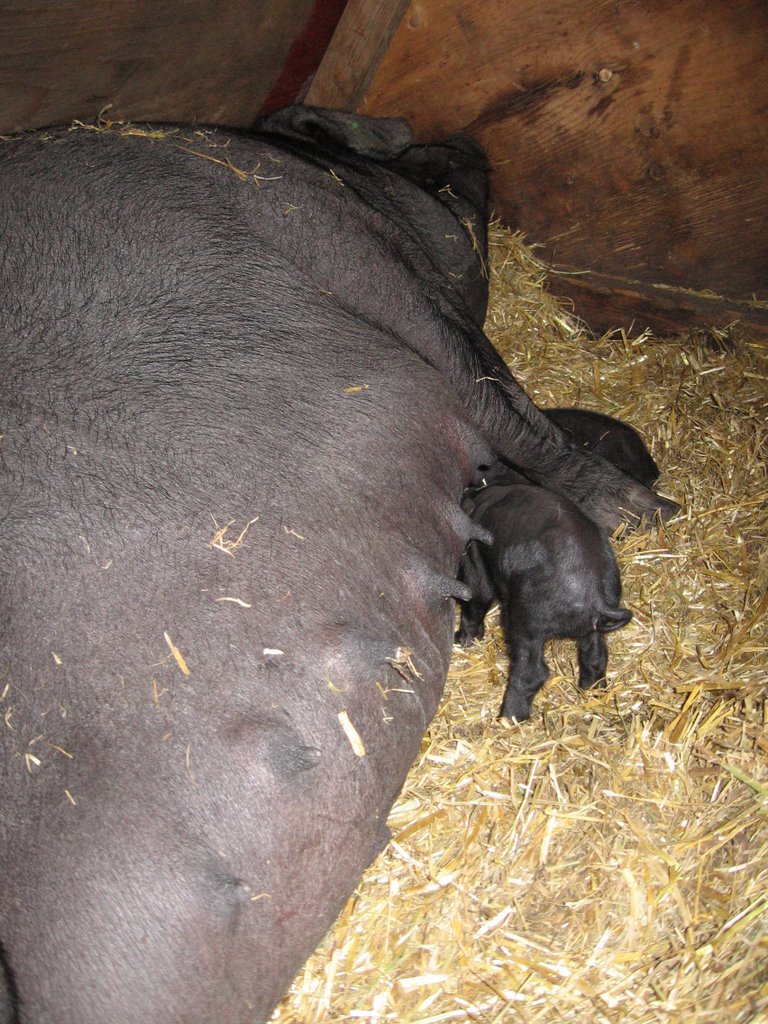
Last night 'Penelope' was in her hut and wouldn't come out to eat. This is somewhat unusual for her and when I checked her udder, she had lots of milk! I went back to the house and mentioned to Cindy that I thought she was close. Sure enough, this morning as I was walking past her hut to feed the chickens out in the field, I heard some squeaking from within. I checked quickly and there were two that I could see. I am unsure if she was still in the middle of labour, but I hope she has more than 2! When I get home from work I will check again and see what is up and report more. In the meantime, I had a chance to take a quick picture before I left her for the day.
Tuesday, October 03, 2006
Another Picture of Digging Potatoes
Monday, October 02, 2006
Time for a little hunting...

Garreth and I took a few days off to go Antelope hunting last week. It was fun to be out of the house together and I had been successful in a draw for a trophy Antelope in southern Alberta. I have never hunted with a rifle before, but being a bowhunter, and very familiar with the area we were to hunt, I suspected that our hunt would not last very long. I was correct. We drove for 5 hours to the zone we were allowed to hunt. We then sought the landowner to give us permission to hunt and found him in his truck overlooking a vast prairie landscape with a small herd of Antelope visible in the distance. After a brief conversation, Garreth and I snuck a couple hundred yards to the crest of a hill where we could be at least a little closer. I steadied the rifle and began searching through the scope for the buck. At first I couldn't see him, but soon spotted the tips of his horns bouncing towards us from behind a distant hill. Garreth and I became very still as he approached to within 150 yards and stood perfectly broadside. I whispered if Garreth was ready and he nodded "yes". I have to admit that the crosshairs of the rifle scope were vibrating a little with excitement, but it was nothing compared to the panic of being within 20 yards of your prey with a bow in your hands. I pulled the trigger and the buck went down instantly. Our hunt was over. We spent the rest of the evening, cleaning and cutting Antelope meat and then drove home the following morning. It was a good little trip.
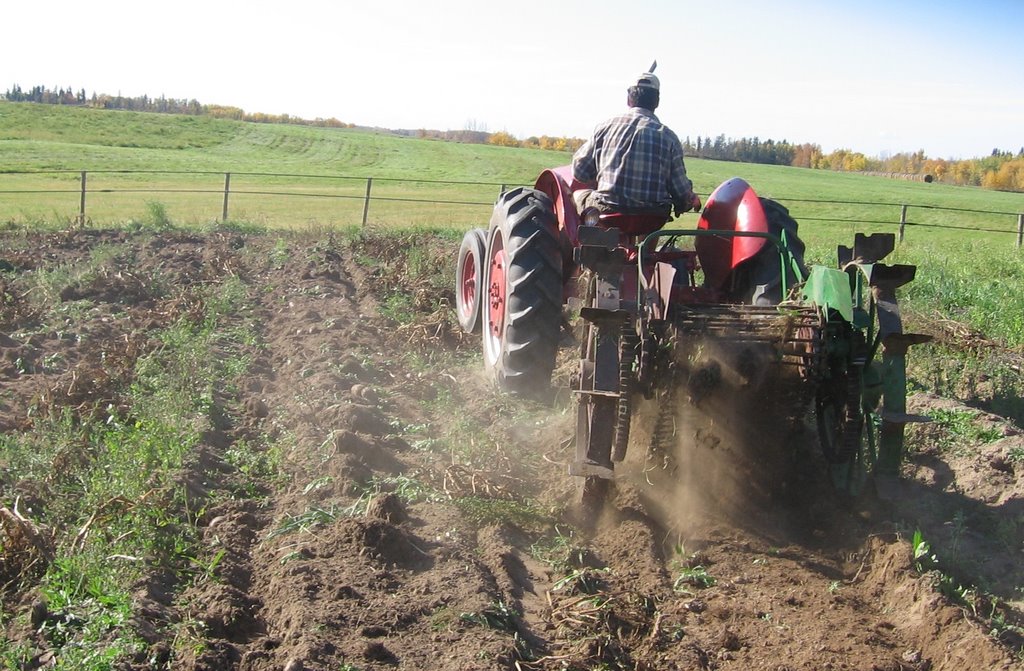
Digging Potatoes

It was finally time to harvest our small field of potatoes. There have been a couple of killing frosts over the past 2 weeks and the tops had died off. I had hoped that the skins of the potatoes had set enough to avoid damage going through the digger. I have an old horse-drawn digger that has been modified by a previous owner to be pulled by a tractor. The N did a pretty good job, although a tractor with more hp and a lower gear would have worked better. We ended up with somewhere around 600 pounds of Russian Blue and Banana Fingerling potatoes. The kids followed behind the digger collecting the potatoes that were left laying on top of the newly dug soil. We put all the potatoes in a wagon and brought them back to the house to be stored in the cold room downstairs.
Wednesday, September 20, 2006
Another Chicken Day

Harvesting has ground to a halt and the ground is too wet to do much of anything lately. I have been tinkering around the farm here and there, but other than that, I have been enjoying a bit of a rest. Still though, with winter coming fast, it would be nicer to be out getting the harvest complete and finishing some other tasks around the place that are weather dependant. We had a killing frost on Sunday night...that means that the potato tops are now dead or dying. I can go ahead and harvest potatoes anytime after this coming weekend. Tonight, Cindy is renting a one-man auger for installing some fence posts. I have to finish my new pig pen before it snows.
Wednesday, September 13, 2006
Small Farm Canada
I don't think I can scan the article to show everyone, I will have to check on that.
http://www.smallfarmcanada.ca/
If you scan WAY WAY down the page, you will see the little blurb about my article.
Monday, September 11, 2006
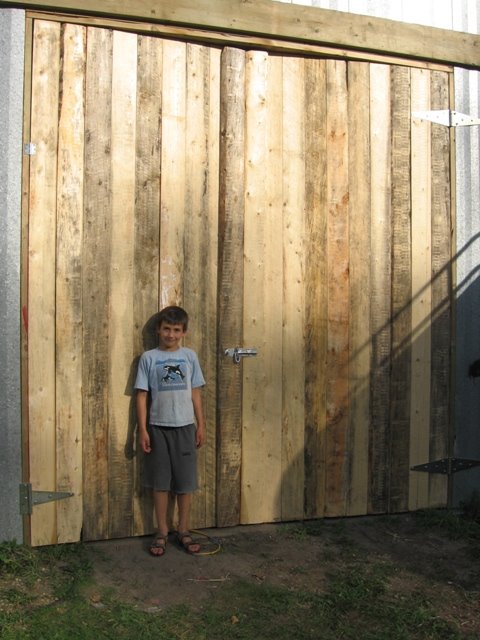
New Doors
Weekend Tasks
I spent the weekend busy as usual around the farm. On Saturday I was combining for most of the day down at Vince's place. We were still combining oats. These were the oats that I had swathed last weekend. We had had hot dry weather all week so the combining went really well. I was in second gear with the variable speed kicked up a couple notches...as far as a 1968 combine is concerned, I was flying! Still though, it was a little disheartening to watch Vince's much newer John Deere 8820 going past me on a regular basis. It was like the first time marathoner, so proud to have trained so hard to be there in the first place only to watch the entire field of runners filing past one after the other throughout the race! No surprise though, the JD has almost three times the capacity and a 280 horsepower diesel compared to my 105 hp gas engine.
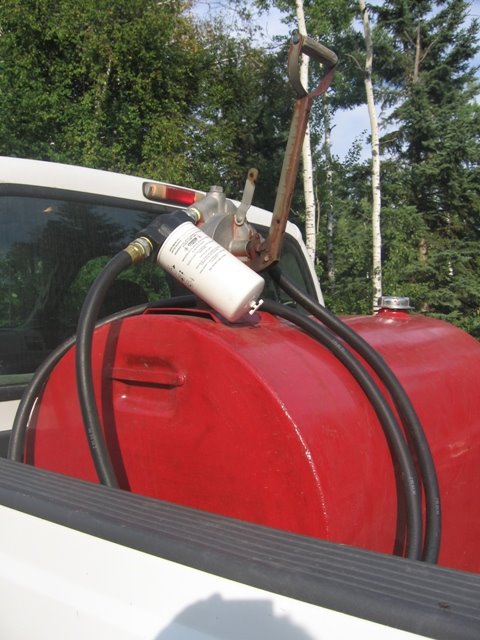
On Saturday morning, I did manage to get one irritating problem corrected. On my old tidy tank, the hose was leaking every time I used it. I had to stick the hose end deep into whatever tank I was filling to avoid losing fuel onto the ground. I went to the UFA store and picked up a new hose...then I thought I may as well install a filter. It didn't take long to install, but it wasn't a cheap R&R either. It is an older tank with 3/4 inch hose fittings. The only filter fitting I could find was 1". I needed some pipe fittings and teflon tape to make everything come together. It is a much longer hose now too...I don't have to get quite so close to whatever I am filling anymore.
Tuesday, September 05, 2006
The 503...a blur of activity
The 503 at home

The New Combine
Tuesday, August 29, 2006
Collecting Hay
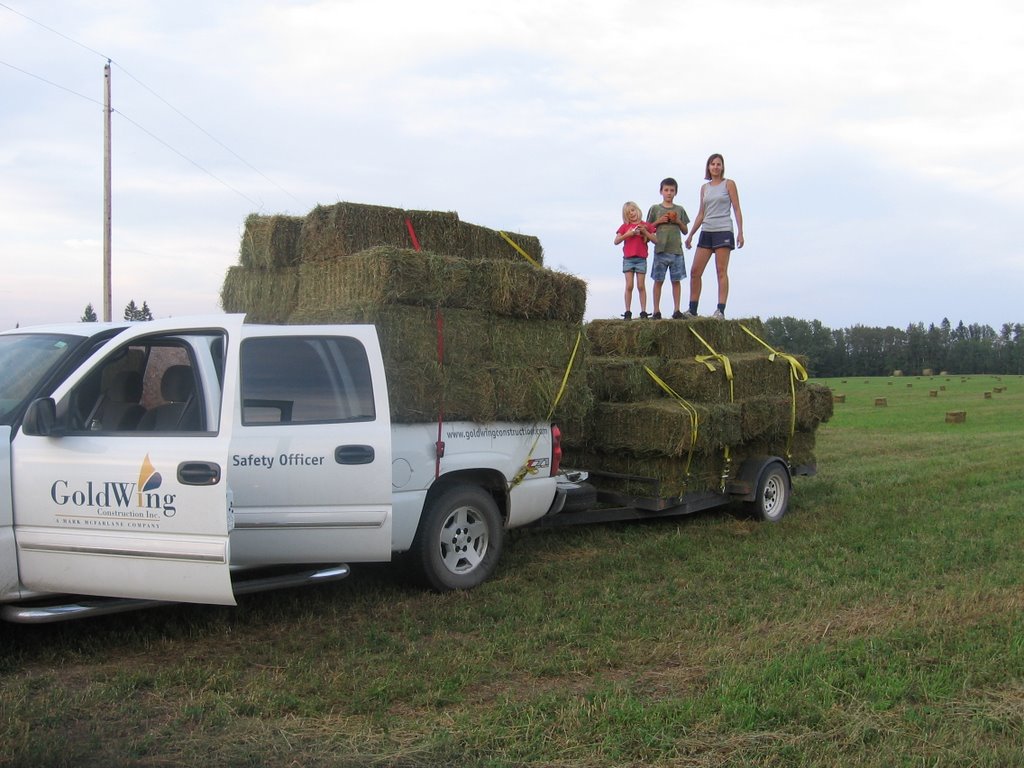
Summer is almost over and it is time to start getting ready for our long winter of feeding animals. To that end, we have purchased 100 2nd cut alfalfa bales. They are certified organic and are very rich. We will mix this hay with our grassy organic hay from our own land when we feed the cows. The pigs will eat this rich alfalfa hay as it sits. I will run it through the hammer mill and then mix it with the grain chop. I can feed it dry, but they much prefer it when I mix it with warm water. It makes a great smelling green porridge! Very tempting. We only got 72 bales on this load. Tonight I will drive to the farm and pick up the remaining 28. I do need a bigger trailer. Usually, I would take the big Ford diesel for a job like this, but I have the insurance off it for the time being and didn't think to reinstate it for this week of hauling hay.
Monday, August 28, 2006
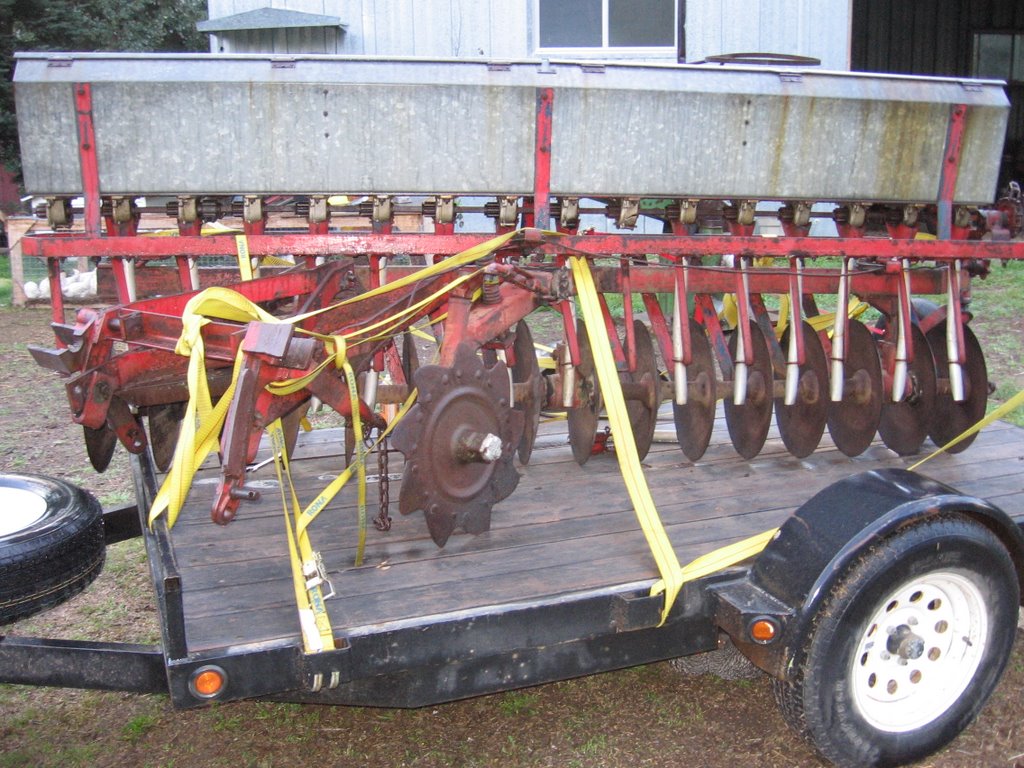
Seed Drill Ready To Go

Thursday, August 24, 2006
The Broke Seeder Part

Here is a better view of the part that I broke. I assume that it is cast aluminum and it is quite thin. Any ideas out there for how I can fix this? There is a sliding cam that needs to fit into this housing and it does need to have the strength to resist the turning of said cam. Still though, I don't think it needs to be tremendously strong or they would have made it thicker to begin with. I have been told that perhaps some sort of epoxy would work.
My Project Last Night
Monday, August 21, 2006
Happy Girl
The Farrowing Hut...another view

The Farrowing Hut
Friday, August 18, 2006
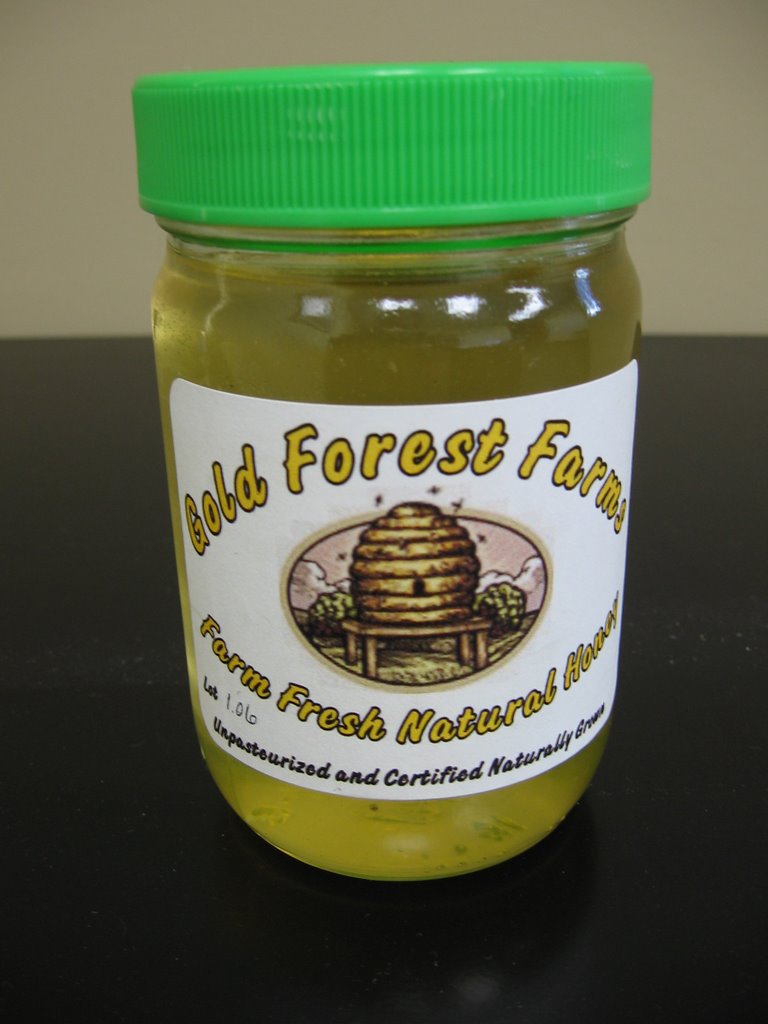
A Jar of Honey
Monday, August 14, 2006
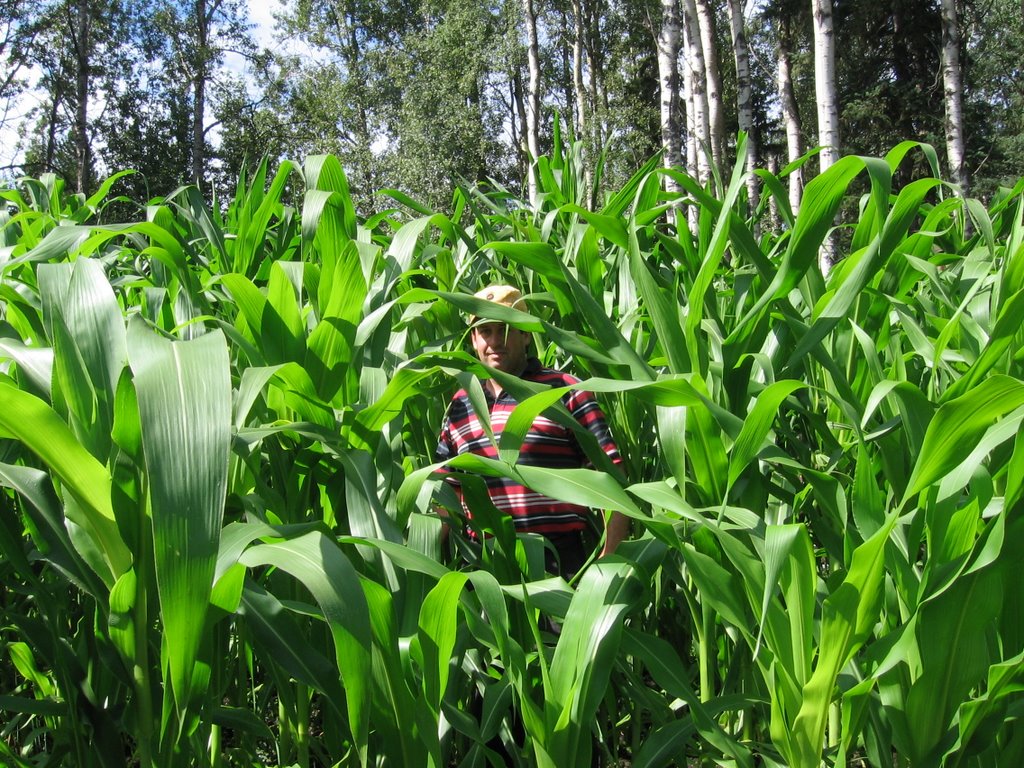
Look at the corn now...
Mowing
Friday, August 11, 2006
The Final Product
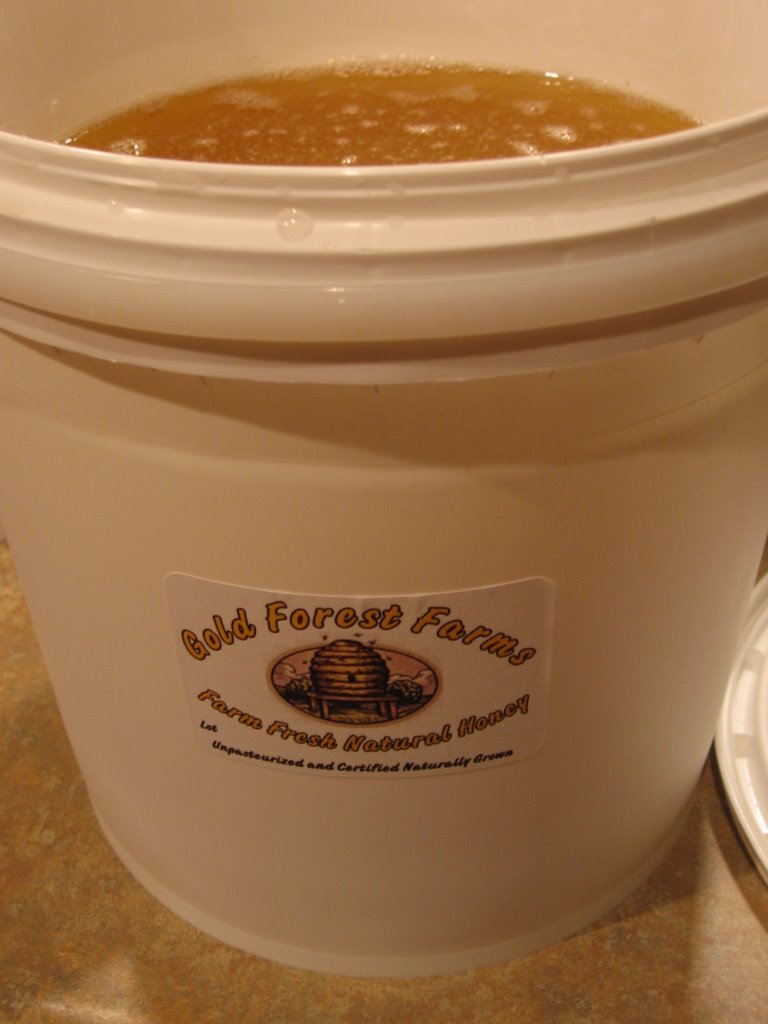
Here is a 20 pound bucket of Certified Naturally Grown honey. It is a rich golden colour this year...last year, it was definitely a lighter colour. I am not sure why the difference, but it has to do with what flowers the bees visited and also the fact that the frames of honey comb darken with age and therefore, the honey also darkens. I personally like the darker colour of honey, but it is interesting to note that the lighter honeys demand higher prices commercially. In different parts of the world honey comes in a multitude of colours...some of it is dark brown. Alberta is one of the leaders in the world for honey production. There are hives everywhere!
The Old Extractor

This is the extractor in operation. The photo makes it look like it is spinning much faster than it actually is. Really, it doesn't take a fast spin or a very long spin in order to get all the honey out of the frames. There is a large valve at the bottom that, when opened, allows the honey to drain once it is out of the frame. I was looking for an extractor when I saw this one advertised in a local paper. I went to see it and it was in near perfect shape and very old. I am thinking that it was built sometime in the 40's or 50's. It works the same as it did the day it was built and I intend to look after it so that my grandkids can use it if they want to.
A Frame of Honey

This is what a full frame of honey looks like as it comes out of the hive. It looks white because there is a thin layer of bees' wax that covers each individual cell full of honey. This is called "capping". Once the cappings are removed, the honey is ready to be extracted with centrifugal force in the antique extractor.
Extracting Honey!!

Well, I was about 3 weeks late in getting the honey out of my hive. It was just one of those things where I couldn't get organized enough to get it done. Cindy finally picked up some containers and I finally found a few hours to try to get the job done!
The first step in extracting our honey was to get the bees out of the way! What I do is take the boxes (supers) full of honey and bees and set them aside and on their sides. When the 'hive' is re-orientated on its side and exposed to the light and open air, they will vacate. At the same time, I replace the full supers with empty ones to give the bees room to start filling comb again. After I take the full boxes off and tip them on their sides, I simply wait for a couple hours to let the residents get out of the way!
The next step was to actually take the honey from the comb. This is the fun part. The frames are taken out of the supers one at a time and I cut the cappings off. The cappings are simply the "corks" that the bees put over the honey to let it cure and keep it safe for later. Once I have the cappings removed with a long knife, I can place the frames into the old extractor.
Once all four frames are placed into the extractor I just spin the handle for a few seconds. It doesn't take more than 30 seconds or so of spinning to get all the honey out. Once one side is extracted, I flip the frames over and spin them again to empty the other side.
Last night I only managed to get one super extracted. It was cold and rainy...about 15 degrees celcius. The honey wouldn't flow very well at that temperature and it took a long time to have it go through the sieve and into the large buckets. I need to put the raw honey into disinfected buckets to let it settle out any foreign particles and impurities. The air bubbles rise to the top and the particles fall to the bottom. In a few days, the honey will be ready to bottle.
It is amazing honey...when it is fresh you can still smell the flowers! It tastes wonderful that I can tell you!